
|
Home Table of Contents News Dev Blogs Gallery Timeline Legend Tags |
|
Join us on... |
|
|
|

|
|
Home Table of Contents News Dev Blogs Gallery Timeline Legend Tags |
|
Join us on... |
|
|
|
Current: Month Day, Year
Rendering inside Makehuman 2 mostly is used to create screen shots with all the available assets including floor and cubemap.
A second way to only get the character for a paint program on a unicolored or transparent background is also provided.
Select the render mode from the drop down menu. Select width and height of your image. Foreground render is mostly limited to a certain size provided by PySide6. For background render also a screen of e.g. 8192 x 8192 pixel may work. Although it may take some time.
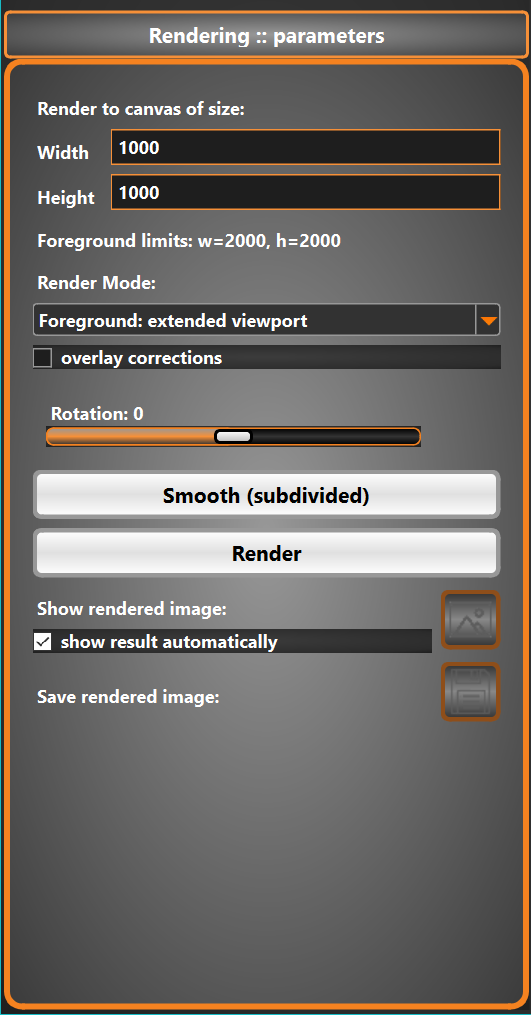
If a pose is loaded or an animation is supplied, you can select a certain frame and also decide if you use overlay corrections.
The “Smooth” button starts the Loop method for subdivision surfaces for triangular meshes. The mesh is smoothed, but partly texture problems may be visible. Especially seams will be a problem. (A replacement might be the interpolating butterfly algorithm in future). Subdividing the mesh will take some time.
“Render” will start the render process. To see the result either press the scenic button or switch on “show results automatically”. The scenic button will always show the last rendered image.
Press save button to save the image to disc. The “render” folder is preselected.